> ## Documentation Index
> Fetch the complete documentation index at: https://novita.ai/docs/llms.txt
> Use this file to discover all available pages before exploring further.
# Verba
> Integrate Novita AI with Verba to simplify data management and unlock contextual answers instantly.
Novita AI has redefined LLM application development through its seamless integration with Verba. By merging Novita AI's innovative platform with Verba's advanced NLP framework, developers gain access to superior performance, enhanced customizability, and a user-friendly experience.
This guide will walk you through how to integrate Novita AI API with Verba.
## Integration Steps
### Step 1: **Visit the Verba Website**
* Open your browser and navigate to [https://verba.weaviate.io/](https://verba.weaviate.io/).
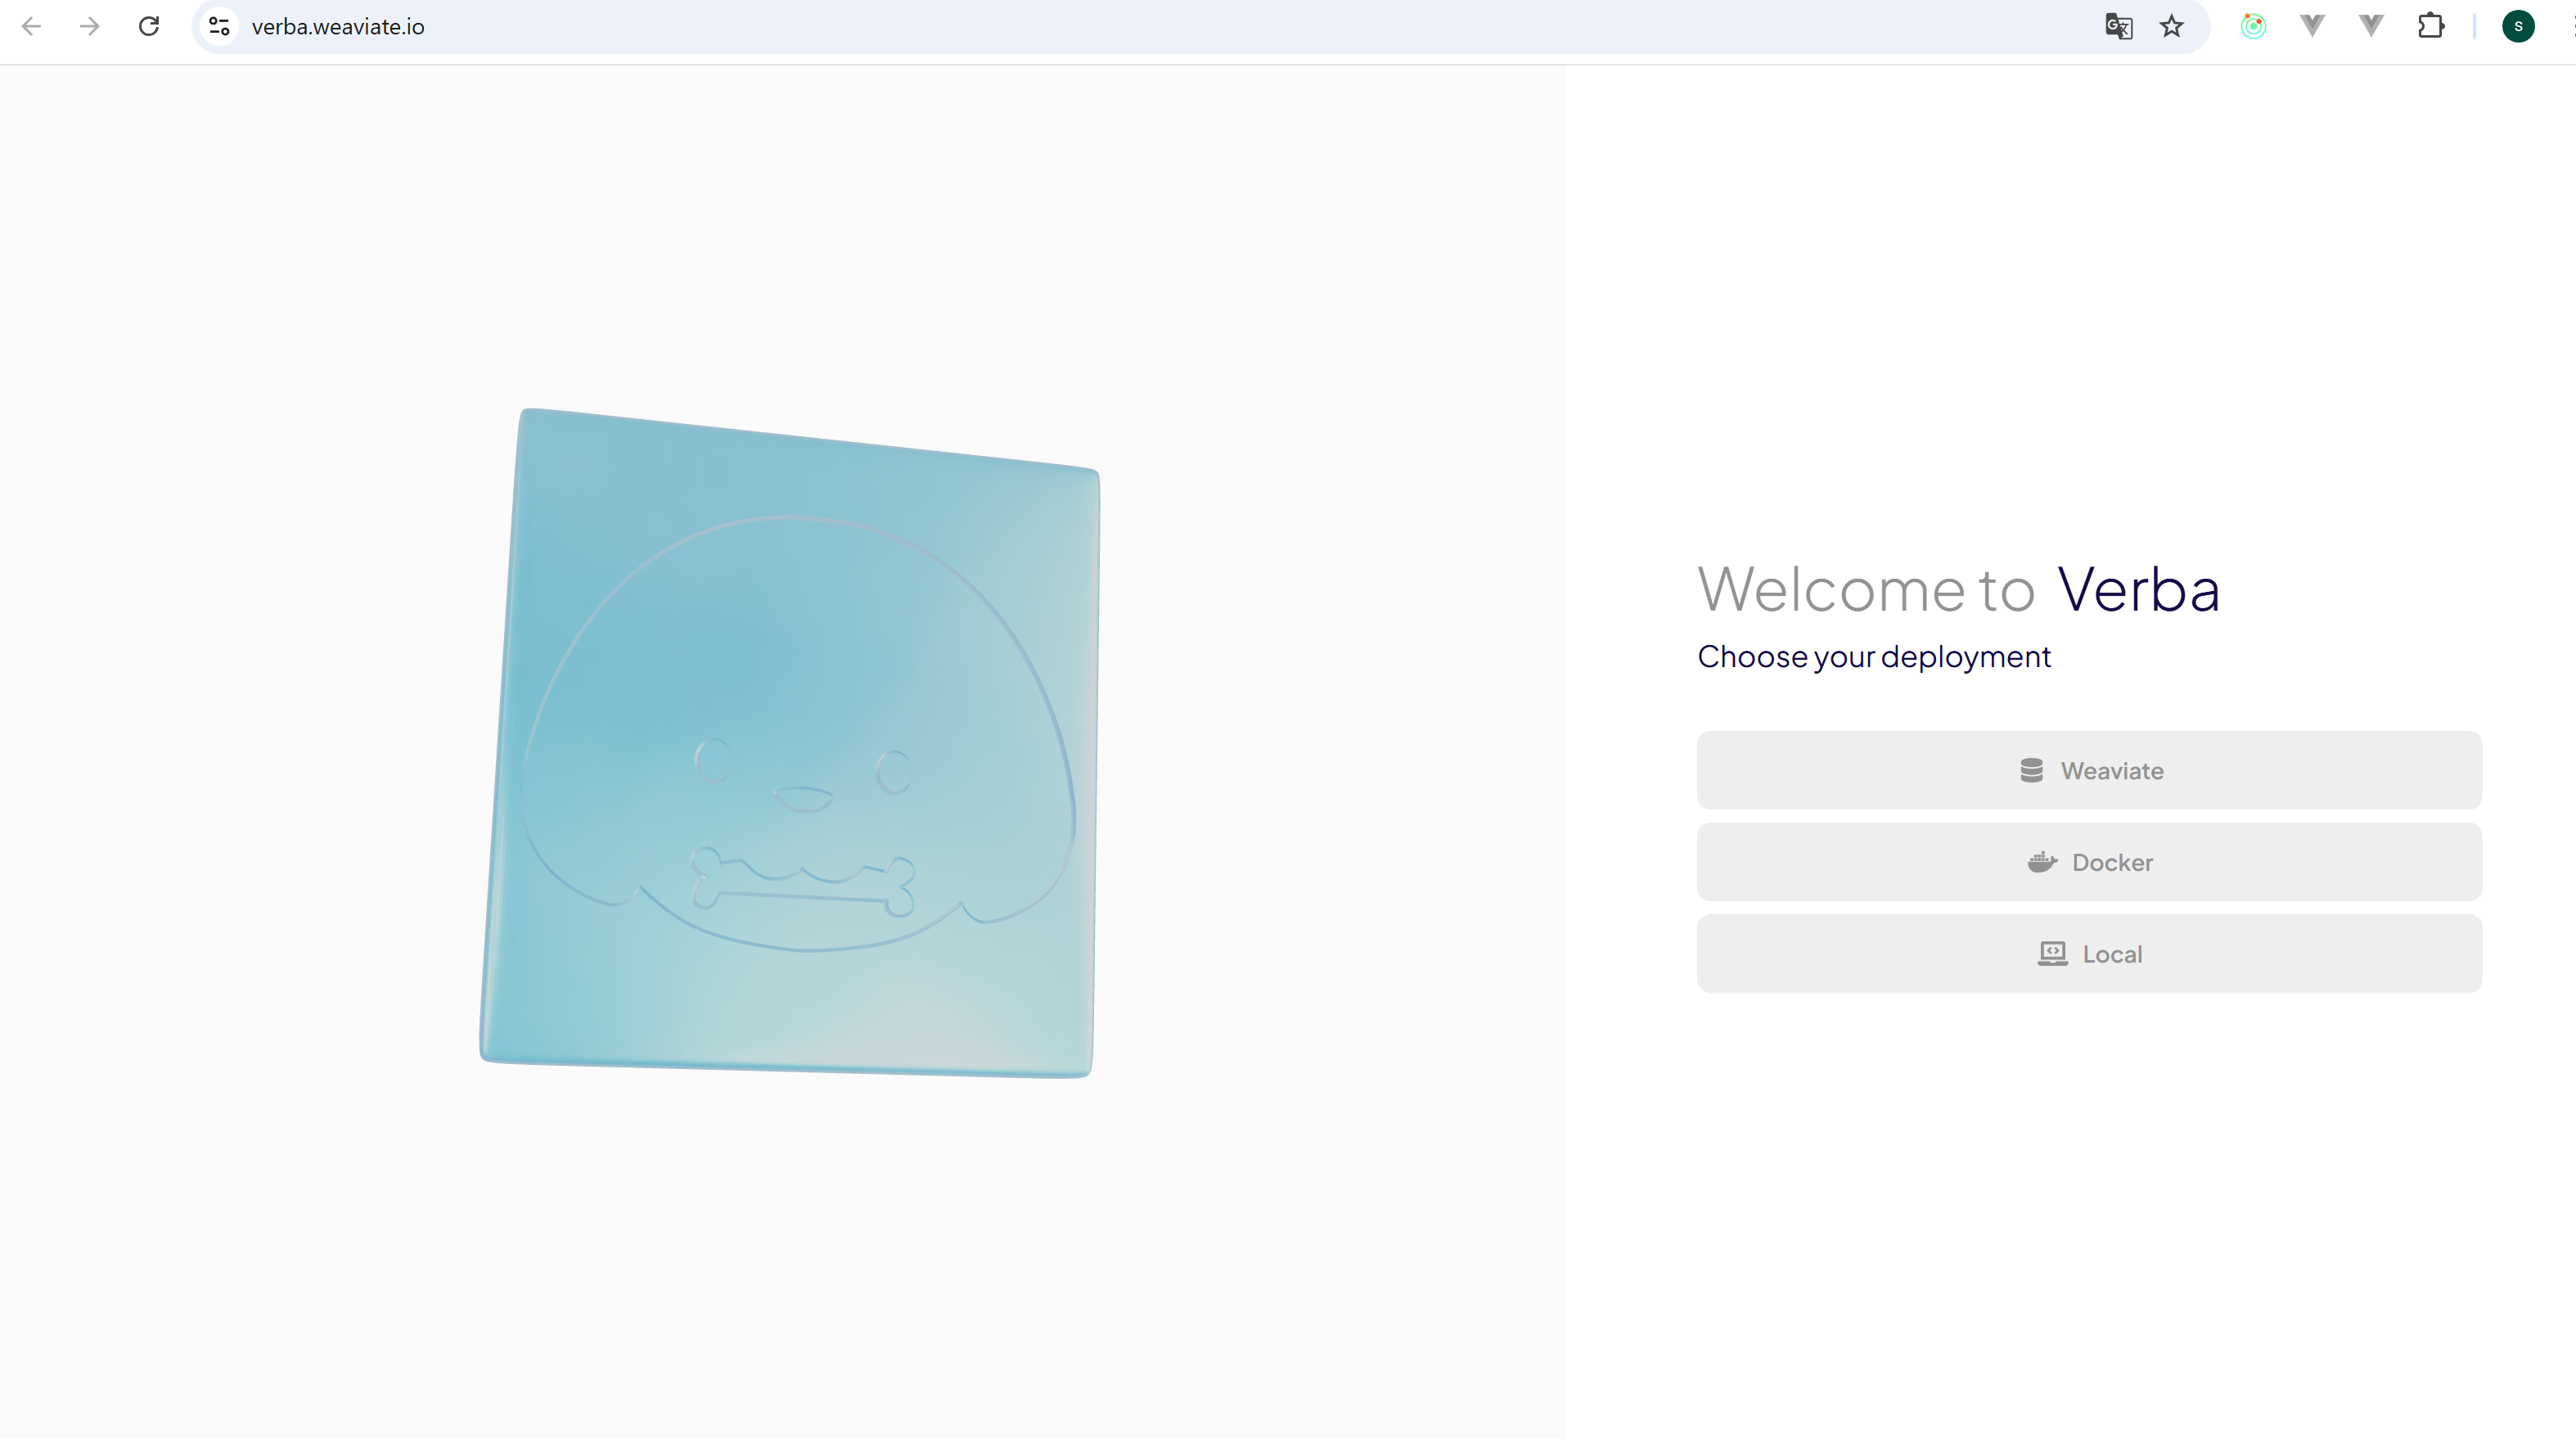 ### Step 2: **Choose Deployment Option**
* Select your preferred deployment method on the homepage to proceed.
### Step 2: **Choose Deployment Option**
* Select your preferred deployment method on the homepage to proceed.
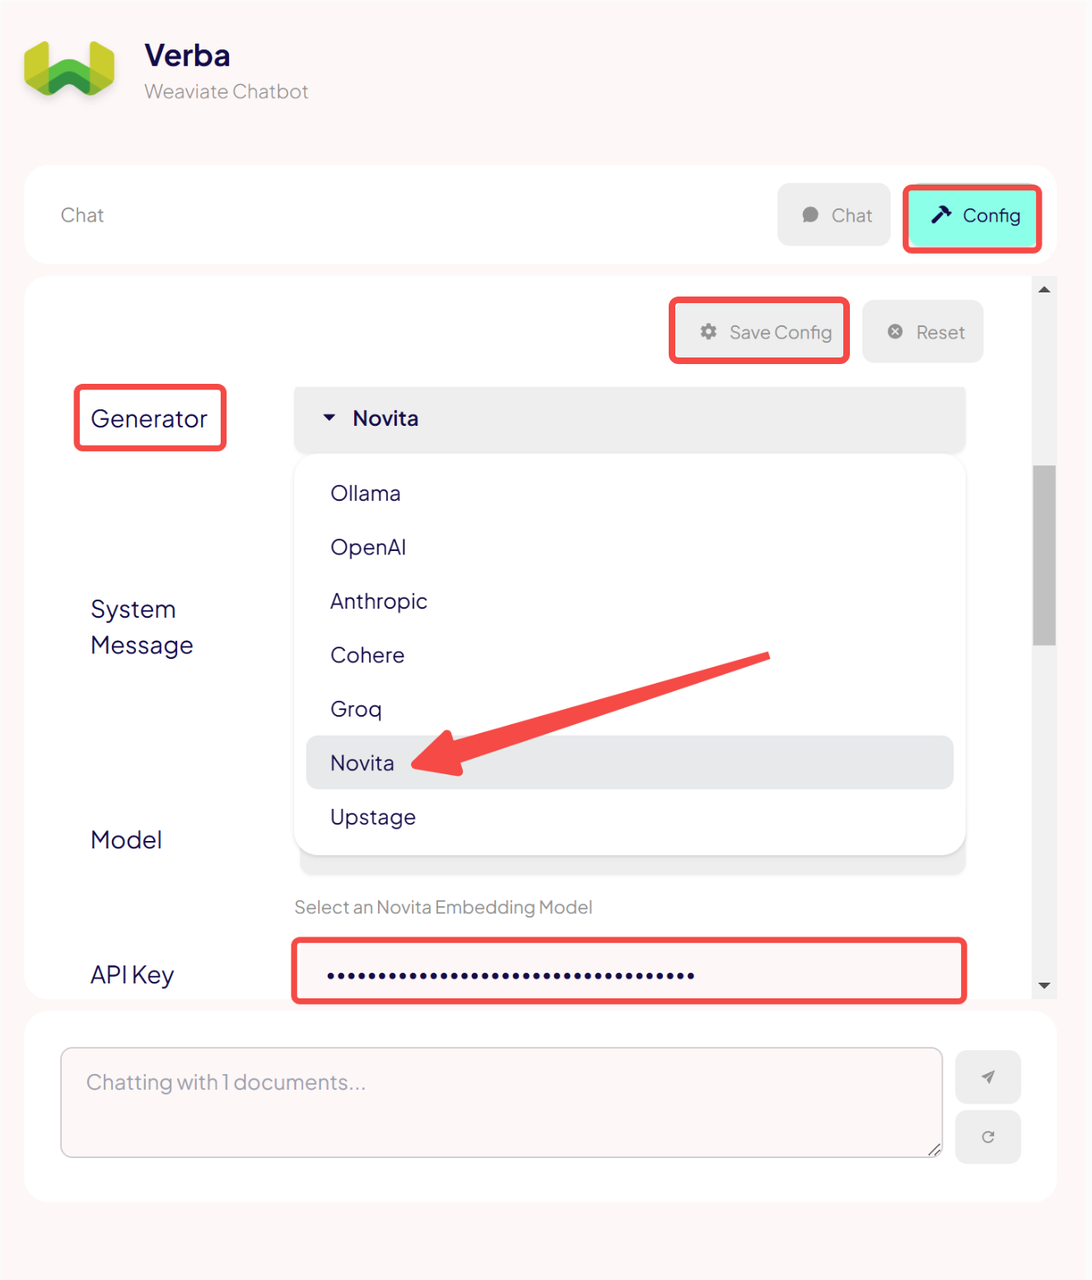
 ### Step 3: **Configure Settings**
* Click the "Start" button at the bottom-right corner.
* On the left-hand side, click **Config**.
* Under **Generator**, select **Novita**.
* Enter your [Novita API Key](https://novita.ai/settings/key-management) in the **API Key** field.
* Finally, click the **Save Config** button to apply your settings.
### Step 3: **Configure Settings**
* Click the "Start" button at the bottom-right corner.
* On the left-hand side, click **Config**.
* Under **Generator**, select **Novita**.
* Enter your [Novita API Key](https://novita.ai/settings/key-management) in the **API Key** field.
* Finally, click the **Save Config** button to apply your settings.
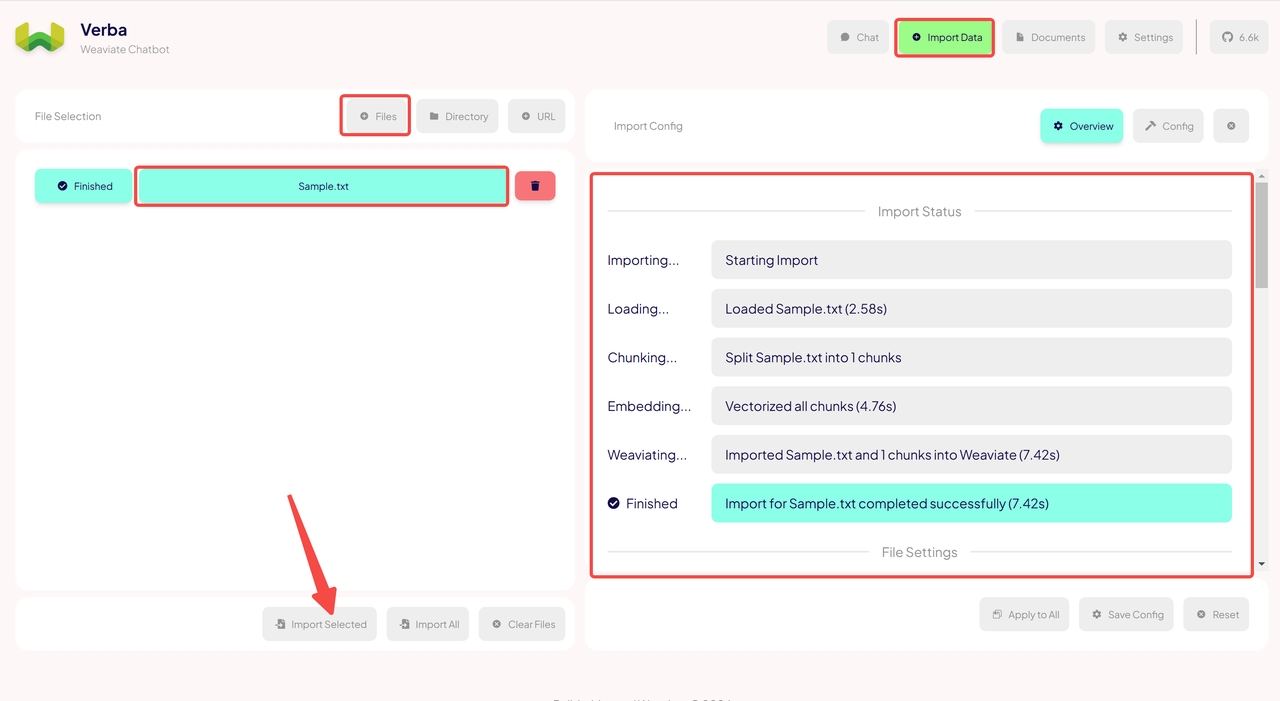
 ## Step 4: **Import Data**
* Click the **Import Data** button in the top-right corner to open the file import page.
* Select the **Files** button at the bottom to open the file selection window.
* Choose the files you want to import and click the **Import Selected** button at the bottom-left corner.
* A successfully imported file will display on the right-hand side of the page.
## Step 4: **Import Data**
* Click the **Import Data** button in the top-right corner to open the file import page.
* Select the **Files** button at the bottom to open the file selection window.
* Choose the files you want to import and click the **Import Selected** button at the bottom-left corner.
* A successfully imported file will display on the right-hand side of the page.
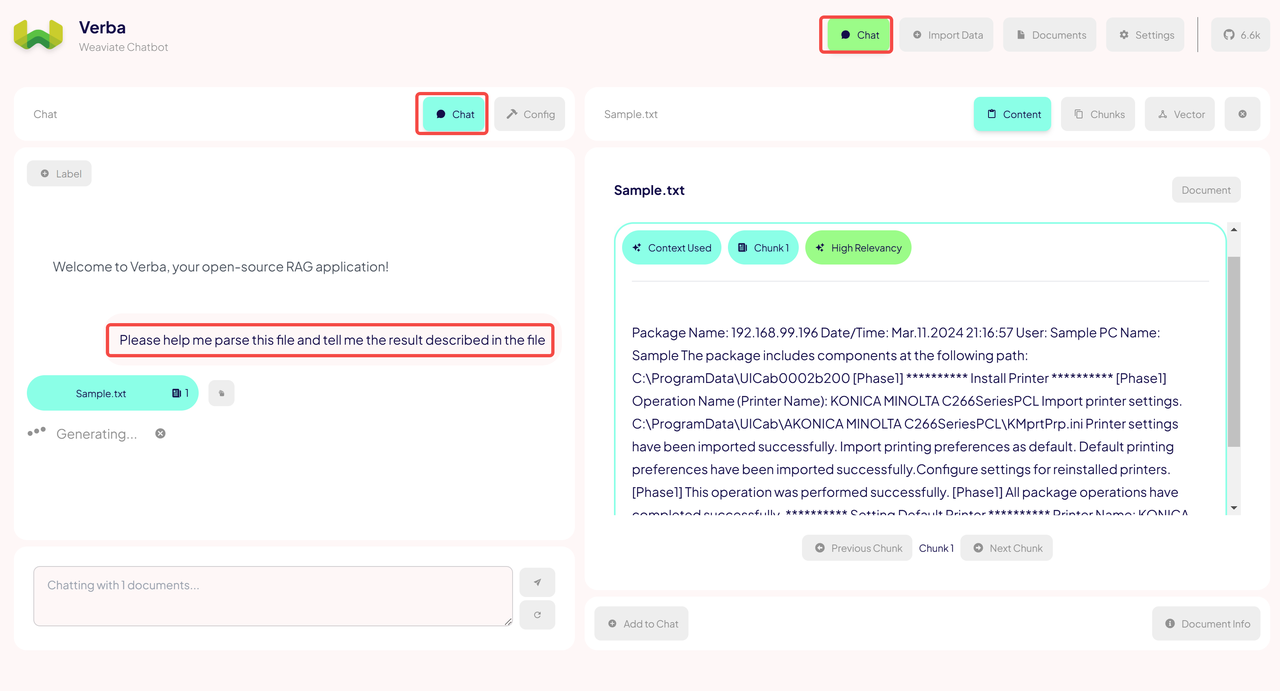
 ### Step 5: **Start Chatting**
* Click the **Chat** button at the top to return to the chat page.
* Enter your questions based on the imported file to receive accurate results instantly.
### Step 5: **Start Chatting**
* Click the **Chat** button at the top to return to the chat page.
* Enter your questions based on the imported file to receive accurate results instantly.